 Kuebix is now a part of FreightWise
FreightWise Shipments Training
The Shipments tab offers the familiar, easy user experience of the Bill of Lading (BOL) tab plus a list of new features designed to elevate your functionality and daily workflows. This means a smooth transition to a more powerful feature, without a steep learning curve. Did we mention that you can do your same activity, with less clicks?
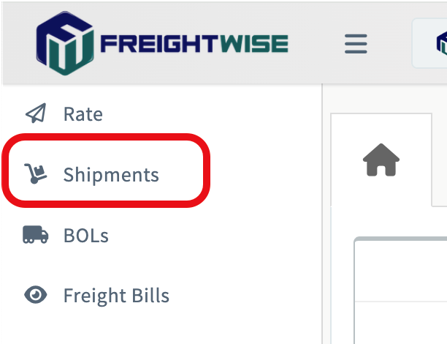
Don’t see Shipments as an option? Reach out to support@freightwisellc.com or your Director of Commercial Operations to ensure that you and your team have the correct user roles!
Ready to get started?
- Navigating the Shipments Grid
- How to create an LTL Shipment
- How to create a Parcel Shipment
- Create a Shipment from a Quick Rate
- Create a TL Shipment
- Create a Spot Quote Directly from a Shipment
- Generate a Commercial Invoice
- Book an Estes by FreightWise Shipment
- Frequently Asked Questions and Comparisons of the Tabs
Navigating the Shipments Grid
How to create an LTL Shipment
How to Create a Parcel Shipment
Create a Shipment from a Quick Rate
Create a Truckload Shipment
Create a Spot Quote
Generate a Commercial Invoice
Book an Estes by FreightWise Shipment
Frequently Asked Questions
How does the Shipments tab different from the BOLs tab in FreightWise?
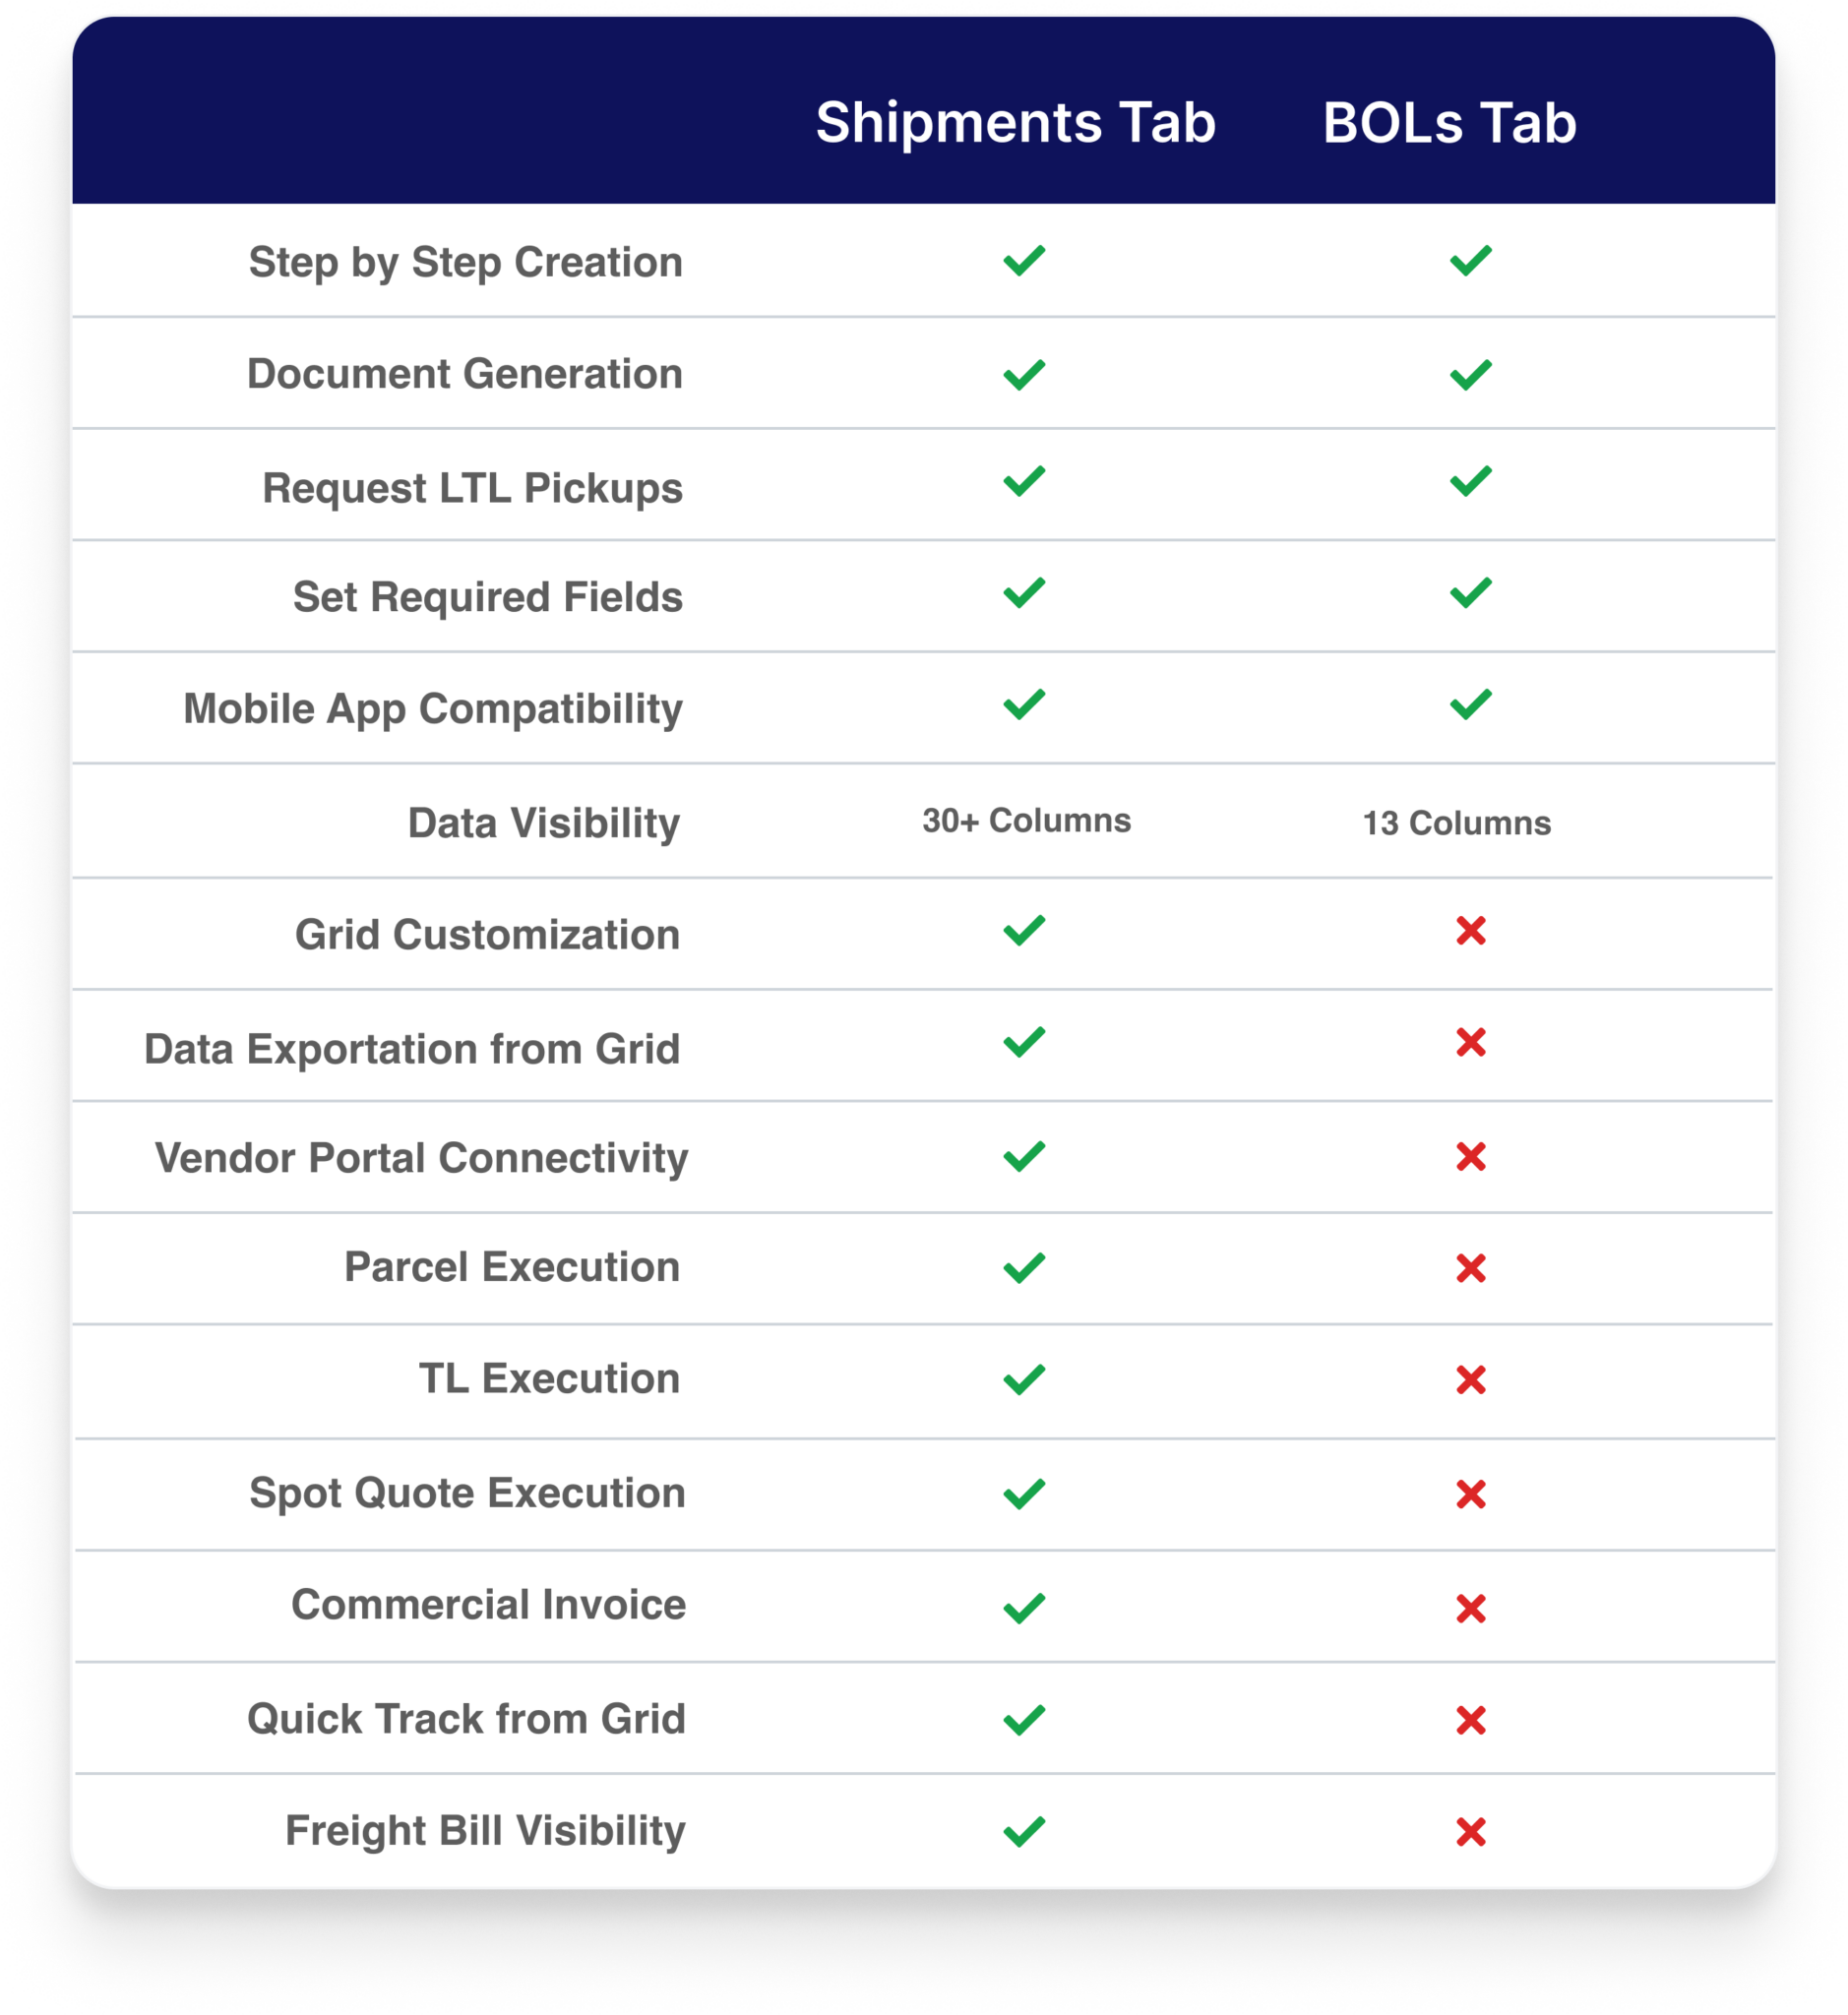
At FreightWise, we’re constantly evolving to bring you the most efficient and user-friendly experience. As part of this commitment, we’re transitioning from the BOLs tab to an enhanced and more comprehensive Shipments tab. This isn’t just a cosmetic change; it’s an upgrade designed to streamline your workflow and empower you with greater control and visibility. Same familiar workflow, just upgraded. As you make this switch, see below for the differences you will see between the Shipments and BOLs tab.
Interface and Workflow: A More Intuitive Journey
The new Shipment tab introduces several interface and workflow enhancements for a smoother user experience:
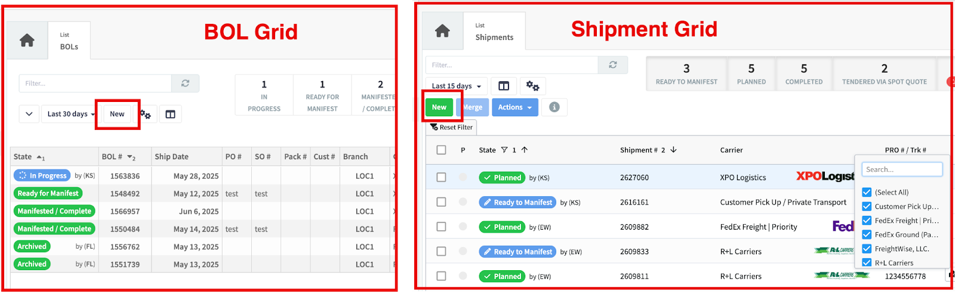
- Revamped Grid & Navigation
- BOL Tab: Utilized a standard grid for displaying BOL information.
- Shipment Tab: Features an updated Shipment Grid that offers the ability to filter, rearrange, and add or remove columns. You’ll also notice the “New” button is now green instead of white.
- Creating Shipments
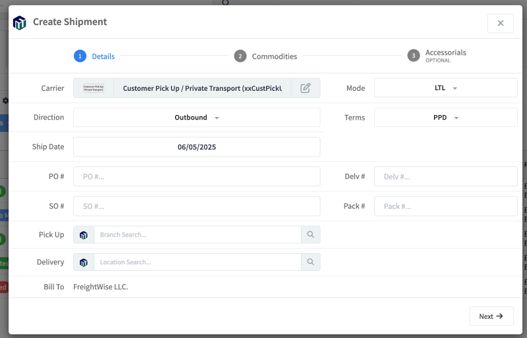
- Shipment Tab: Has the same step by step shipment creation that is well known from the BOL tab. While the process is largely the same and familiar, fields have been rearranged to be grouped with like fields such as the general shipment details (carrier, mode, etc.) and reference numbers (PO Number, SO Number, etc.).
- Terminology Updates
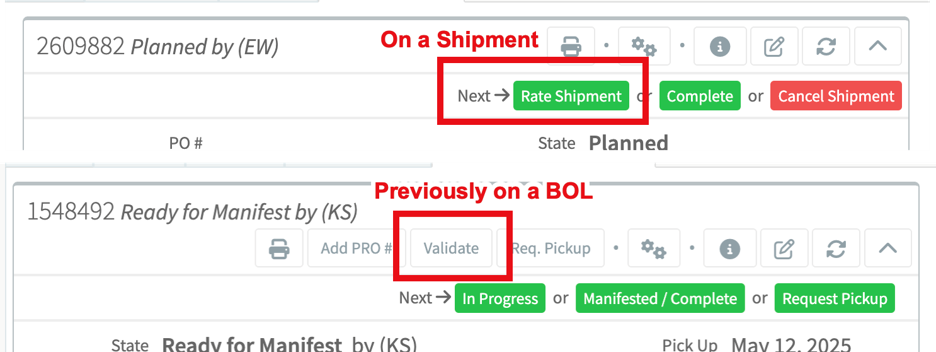
- BOL Tab: Used the term “Validate” for rating and “Validation Results” for rate results.
- Shipment Tab: Employs clearer verbiage: “Validate” is now “Rate”, and “Validation Results” are now “Rate Results.”
- Visual Layout
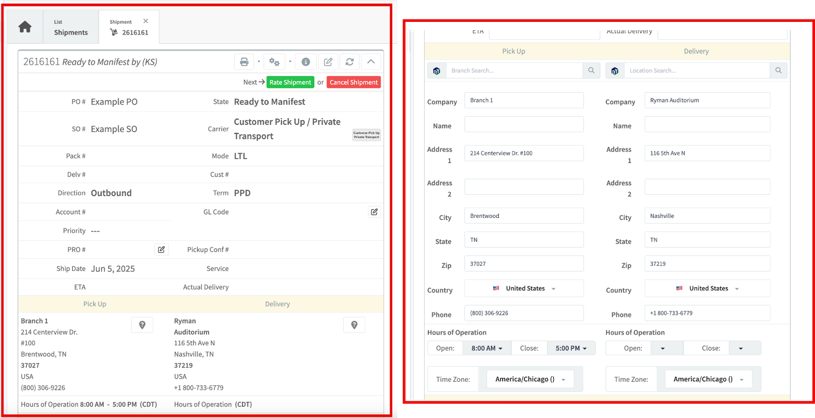
- Shipment Tab: Presents a rearrangement of fields on the main shipment screen for better organization. The address section has been updated and users can now edit address details directly from within a shipment.
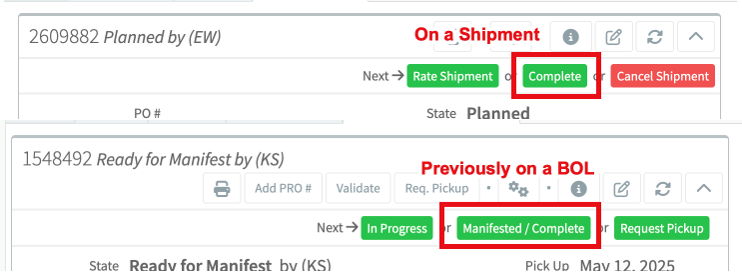
Execution and Status Management: Enhanced Control
Shipment Tab: Features an updated execution and status flow. The key changes include:
- The “Rate” option is now conveniently located next to the main action buttons. A user must now rate a shipment to move it from “Ready to Manifest” to “Planned.”
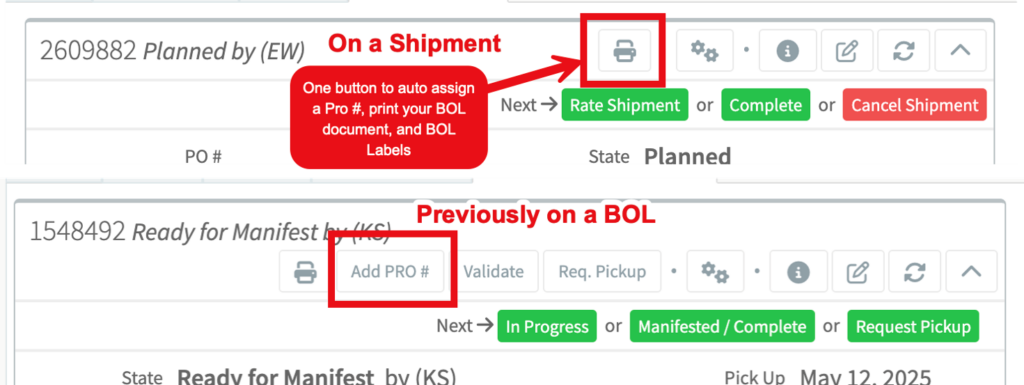
- Documents can only be printed from the “Planned” State.
- The “Add Pro #” button has been removed because the Print Icon on the main panel, automatically adds a Pro# to the BOL document eliminating clicks in your workflow.
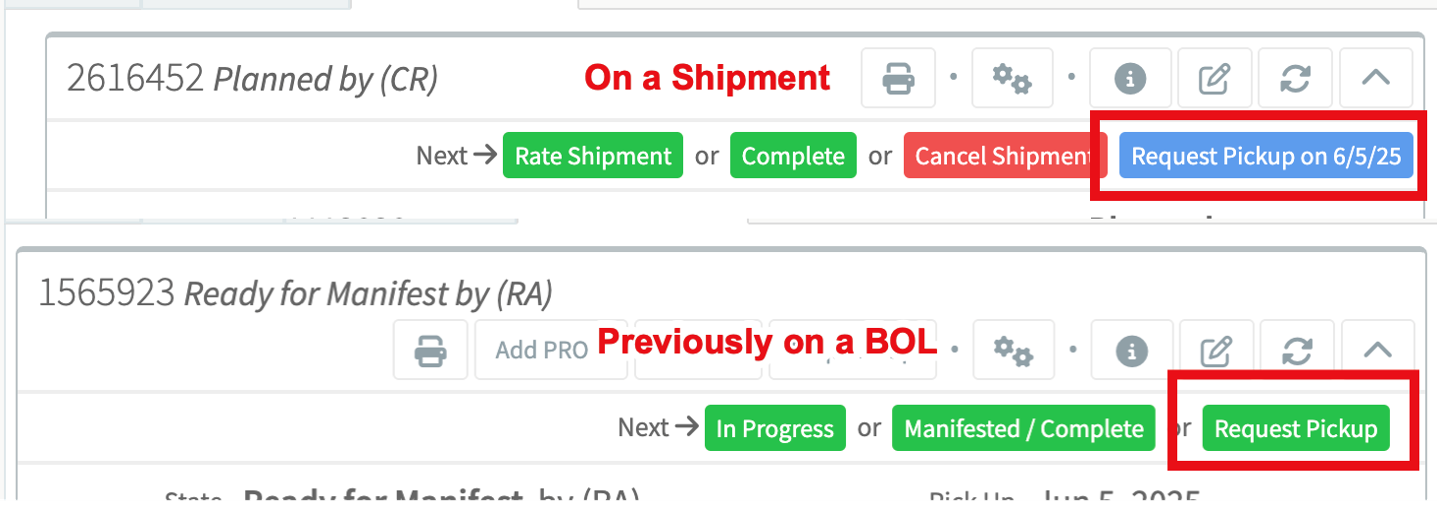
- Request Pickup Button now includes the date for easy visibility.
- The “Manifested/Complete” status is simplified to “Completed.”
- Users now have an additional option to directly “Cancel Shipment.”
- The Shipments tab does not have an option to delete or Archive a Shipment.